
Windows 11 Error 0xC1900101 — How to Fix Driver-Related Update Failures Without Reinstalling Windows
Short description: The 0xC1900101 error in Windows 11 is usually triggered by unstable drivers, BIOS conflicts, SSD issues, USB devices, or third-party software during major system updates. This guide explains how to repair the problem properly without formatting your PC or reinstalling Windows.
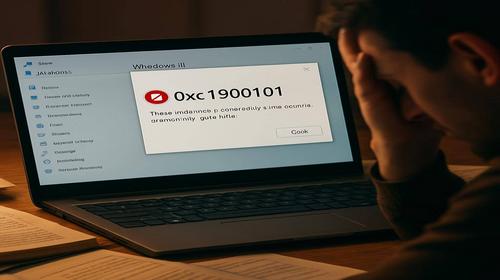
For many users the issue starts the same way. Windows Update downloads a large update, installation reaches 70–100%, the computer restarts, and then Windows suddenly rolls everything back. In update history you see something similar to “Installation failed — 0xC1900101”. After that the laptop fans become loud, SSD activity spikes, CPU usage stays abnormally high, and Windows keeps trying to install the same update again.
The error appears especially often:
- after upgrading to Windows 11 23H2 or 24H2;
- after replacing an HDD with an SSD or NVMe drive;
- after installing a new NVIDIA, AMD, or Intel graphics driver;
- when third-party antivirus or VPN software is installed;
- on older laptops with outdated BIOS firmware;
- when problematic USB devices remain connected during updates.
Why Windows 11 Error 0xC1900101 Happens
The 0xC1900101 code is almost always connected to driver instability or hardware conflicts. During a Windows update the operating system switches into a special installation environment where drivers behave differently than they do during normal desktop usage. If one of them crashes, freezes, or becomes incompatible, the installation process fails and Windows restores the previous version automatically.
The most common causes include:
- Outdated or unstable drivers for GPUs, Wi-Fi adapters, Bluetooth, chipsets, RAID controllers, Intel RST, or NVMe SSDs.
- Third-party antivirus suites and VPN clients interfering with system services or network components.
- USB peripherals using unstable drivers, especially old printers, webcams, docking stations, USB hubs, and card readers.
- SSD or HDD file system errors and corrupted Windows system files.
- Low free disk space on the system partition.
- CPU, RAM, or GPU overclocking.
- Old BIOS/UEFI firmware or incorrect SATA controller settings.
In some cases the issue also causes BSOD errors such as:
- DRIVER_IRQL_NOT_LESS_OR_EQUAL
- INACCESSIBLE_BOOT_DEVICE
- WHEA_UNCORRECTABLE_ERROR
- SYSTEM_SERVICE_EXCEPTION
Laptop users often notice:
- higher temperatures during Windows Update;
- fans running constantly at maximum speed;
- unexpected FPS drops in games;
- heavy SSD usage even while the PC appears idle.
The Fastest Fix for Most PCs and Laptops
In many situations the issue can be resolved by combining several basic fixes:
- Update all major hardware drivers.
- Temporarily uninstall antivirus and VPN software.
- Disconnect unnecessary USB devices.
- Repair Windows system files using SFC and DISM.
- Run Windows Update again.
For a large percentage of users, Windows installs the update successfully immediately after these cleanup steps.
Step-by-Step Guide
- Prepare Windows Before Fixing Error 0xC19001011. Create a Restore Point
- Press Win + R.
- Type SystemPropertiesProtection.
- Select the system drive.
- Click Create.
- Save the restore point.
This gives you a quick recovery option if something breaks during troubleshooting.
2. Check Available Disk Space
- Open This PC.
- The C: drive should ideally have at least 25–40 GB of free storage.
If free space is low:
- Press Win + R.
- Type cleanmgr.
- Run Disk Cleanup.
- Remove temporary files, DirectX shader cache, and old Windows update files.
3. Scan the SSD or HDD for Errors
- Open Windows Terminal (Administrator).
- Run:
chkdsk C: /f
If Windows asks to schedule a disk scan after reboot, confirm it and restart the PC.
4. Close Heavy Background Applications
- Disable Discord Overlay, MSI Afterburner, and GeForce Experience Overlay.
- Close games, browsers, torrent clients, and monitoring utilities.
- Temporarily stop FPS and temperature monitoring software.
Reducing CPU, RAM, and SSD usage helps Windows Update operate more reliably.
- Repair Drivers and Windows Components1. Update Critical Drivers
- Right-click Start → Device Manager.
- Inspect:
- Display adapters;
- Network adapters;
- Storage controllers;
- Devices showing warning icons.
The most important drivers for Windows 11 stability are:
- NVIDIA, AMD, or Intel graphics drivers;
- motherboard chipset drivers;
- Intel RST or NVMe SSD drivers;
- Wi-Fi and Bluetooth drivers.
Laptop users should always download drivers directly from the manufacturer’s support page instead of using random “driver updater” tools.
2. Remove Antivirus and VPN Software
- Press Win + R.
- Type appwiz.cpl.
- Uninstall third-party antivirus software and VPN applications.
- Restart the computer.
Windows Defender rarely causes update failures like 0xC1900101.
3. Disconnect Unnecessary USB Devices
- Completely shut down the PC.
- Disconnect:
- USB flash drives;
- external SSDs and HDDs;
- old printers and scanners;
- USB hubs;
- docking stations;
- webcams and controllers.
Faulty USB drivers are one of the most overlooked causes of failed Windows updates.
4. Repair Corrupted Windows Files
- Open Command Prompt as administrator.
- Run:
sfc /scannow
Once the scan completes:
- restart the PC;
- if corruption remains, continue with DISM.
5. Repair the Windows Image
- In the same command window run:
DISM /Online /Cleanup-Image /RestoreHealth
DISM automatically downloads and restores damaged Windows components.
6. Perform a Clean Boot
- Press Win + R → msconfig.
- Hide Microsoft services.
- Disable all remaining services.
- Disable unnecessary startup apps.
This significantly reduces the chance of software conflicts during the installation process.
7. Run Windows Update Again
- Open Settings → Windows Update.
- Click Check for updates.
- Install optional driver updates as well.
- Advanced Solutions for Difficult Cases1. Update BIOS/UEFI Firmware
- Install the latest stable BIOS version available for your motherboard or laptop.
- Make sure:
- TPM 2.0 is enabled;
- Secure Boot is enabled.
- Use AHCI mode unless RAID is specifically required.
Many older laptops fail large Windows updates simply because of outdated BIOS firmware.
2. Disable Overclocking Temporarily
- Disable XMP or DOCP memory profiles.
- Turn off CPU and GPU overclocking.
- Restore default BIOS settings.
A system may appear stable during gaming but still fail during Windows installation because updates stress hardware differently.
3. Analyze the Failure Using SetupDiag
SetupDiag is a lesser-known Microsoft utility designed specifically for diagnosing Windows update failures.
- Download SetupDiag from Microsoft.
- Run the executable.
- Open SetupDiagResults.log.
- Look for failed drivers or problematic .sys files.
This often reveals the exact driver responsible for the update crash.
Useful Tips and Performance Optimization
- For Older Laptops and Slower PCs
- Keep the laptop plugged into power during updates.
- Enable High Performance power mode.
- Avoid gaming during large Windows updates.
- Reduce startup applications.
- Check Optional Driver UpdatesNavigate to:
Windows Update → Advanced Options → Optional Updates
Windows often hides newer chipset or Wi-Fi drivers there.
- How Error 0xC1900101 Affects Performance
- Windows repeatedly retries failed updates in the background.
- This creates additional CPU, RAM, and SSD load.
- Games may experience stuttering and FPS drops.
- Laptop temperatures and fan noise increase noticeably.
- After the issue is fixed, Windows usually becomes smoother and more responsive.
Common User Mistakes
1. Installing Drivers from Random Websites
- Many automatic “driver booster” utilities cause BSOD errors and instability.
- Always install official drivers from trusted sources.
2. Disabling Windows Update Services
- Some optimization tools disable critical Windows services.
- After that Windows Update begins failing repeatedly.
3. Updating Windows While Overclocking Is Enabled
- Even stable overclocks can break large Windows updates.
- Use default hardware settings before installing major updates.
4. Skipping Backups
- Always back up important data before BIOS updates or major troubleshooting.
- Use cloud storage or external SSDs for safety.
Frequently Asked Questions
1. What does Windows 11 error 0xC1900101 actually mean?
It usually indicates a driver crash or hardware compatibility problem during a Windows update.
2. Can I fix 0xC1900101 without reinstalling Windows?
Yes. Most systems can be repaired by updating drivers, repairing Windows files, and removing conflicting software.
3. Why does the error appear more often on laptops?
Laptops rely on specialized power management, Wi-Fi, and graphics drivers that are more sensitive to compatibility problems.
4. Can SSD firmware cause this issue?
Absolutely. Outdated SSD firmware or unstable NVMe drivers can trigger update failures.
5. Should I disable Windows Defender?
Usually no. Third-party antivirus software is far more likely to interfere with Windows Update.
6. Why do games stutter after failed Windows updates?
Because Windows continues retrying updates in the background, consuming CPU and SSD resources continuously.
7. Will reinstalling Windows permanently solve the issue?
Almost always yes, but in most situations it is unnecessary if drivers and system components are repaired properly.
Читайте також
If you want to learn more about Windows 11 troubleshooting, PC optimization, and hardware fixes, these sections may also help:
Bookmarks
If this guide helped you fix Windows 11 error 0xC1900101, bookmark our blog
Windows troubleshooting and optimization guides
for future fixes and tutorials.
Press Ctrl + D
